Seesaw Quick Start Guide for Teachers
Before you start:
Student Likes and Comments: best to turn off
Students Can See Each others’ Work: best to turn off for home learning
New items require approval: MUST be on so that the teachers sees all student work submitted
Enable item editing: Turn this off as this can allow students to tag one another in their work.
Enable family access: This is to allow parents to see a child’s work and is ordinarily used to provide a home- school link when students are completing work at school. It is probably not necessary to enable this. If you do, bare in mind that parents can message you via the app. This can be turned off after parents are added in the Manage Families menu.
Before you start:
- Decide as a staff how often teachers and students will use Seesaw. Seesaw can be used on tablets, laptops, desktops, Kindle Fire, iPads, phones and chromebooks. It is also worth discussing which version of Seesaw you will use. There are three options:
Seesaw (free): this is fine for most schools. You could set this up now and give students their Home Learning Code. In the event of a pod/school/class closure you could then enable Seesaw Plus. Each class teacher sets their own class up. See below.
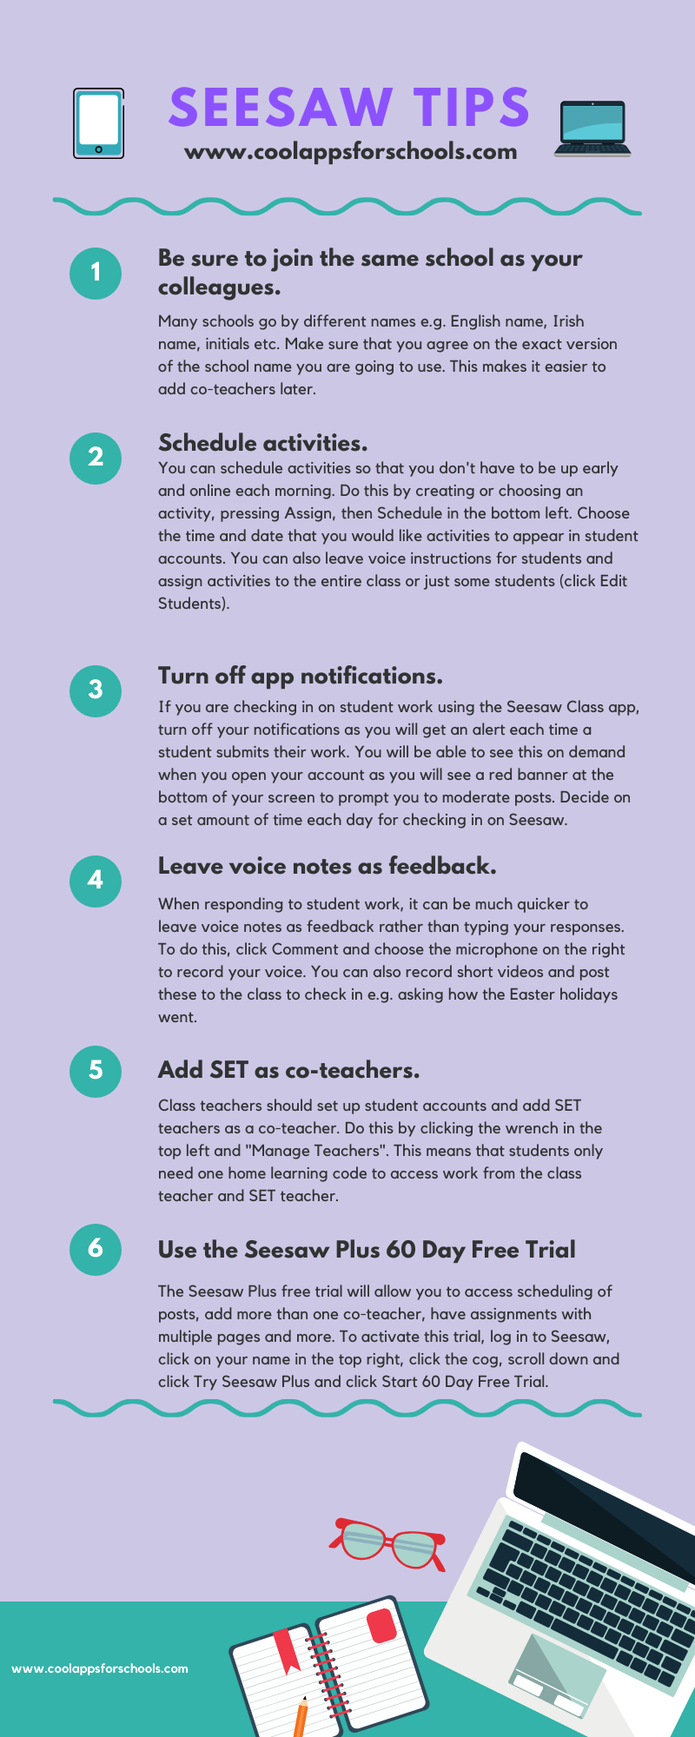
Seesaw Plus: this gives you access to premium features such as being able to assign an activity, send back work and have multiple pages (up to 20) in the Draw screen. You can enable a Seesaw Plus free trial by clicking your name in the top left of the Seesaw screen and then the cog, then Account Settings and Trial Seesaw Plus. Seesaw Plus costs approx €13.99 per teacher per month (funding from circular 31/2020 can be used to fund this). See images for Seesaw Plus features and how to enable a free trial of these features. I would hold off on activating Seesaw Plus until the event of a school/class closure. If this situation arises, individual teachers could then log on to the Seesaw app and sign up for one month of Seesaw Plus to tide them over during class closures. This is charged to your Apple Store or Google Play account so it would be worth agreeing a procedure around this with your principal before doing this. Perhaps you could submit a receipt to your principal and be reimbursed. Each class teacher sets their own class up. See below.
Seesaw for Schools: You need to contact Seesaw to get a quotation for this and must be looking for a subscription for at least 100 students. In this case, one teacher will be the administrator and look after the account set up for all teachers and students. - Students will enter Seesaw by logging in to web.seesaw.me on a browser or using the Seesaw Class app (not Seesaw Family app). Decide whether or not the parent messaging feature will be used. It is best to have a whole school consensus on this. If this is to be used, parents will need the Seesaw Family app also.
- Seek parental consent via Aladdin Connect, Google Forms etc. Seesaw parental consent letter available here. You could copy the relevant text and use it in your message to parents. It is important to contextualise this for your own school.
- Class teachers create their class themselves and add SET teachers as a co-teacher. This gives the co-teacher the same rights as the class teacher i.e. full access to the class. It is not possible to give access to just the students the SET works with. Ensure that all teachers register in the same school i.e. decide on whether you are going by the English name/Irish name of the school. You can check which school you are registered in by clicking on your name in the top left and then look at the bottom of the screen. You can change your school here also.
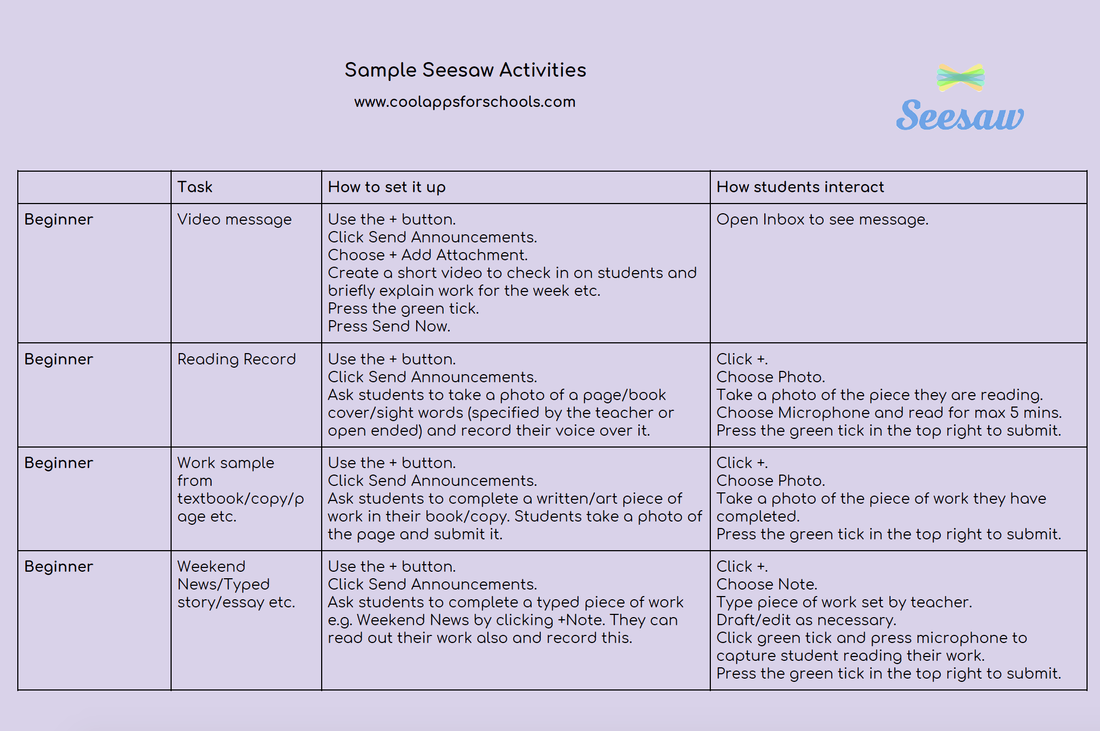
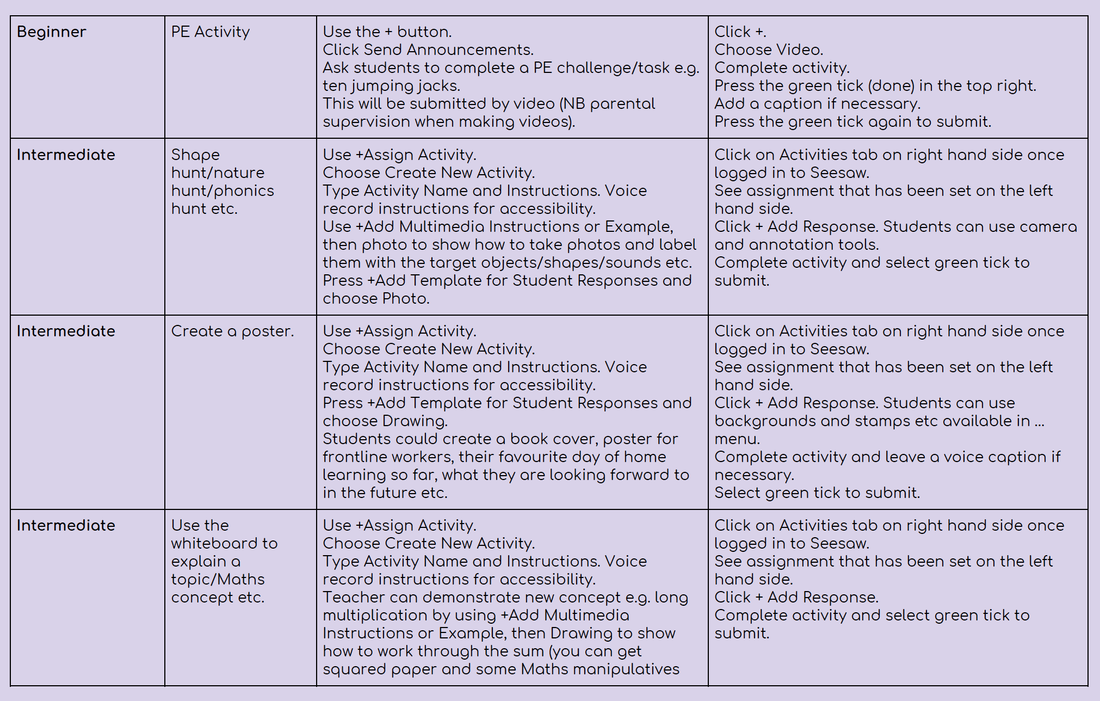
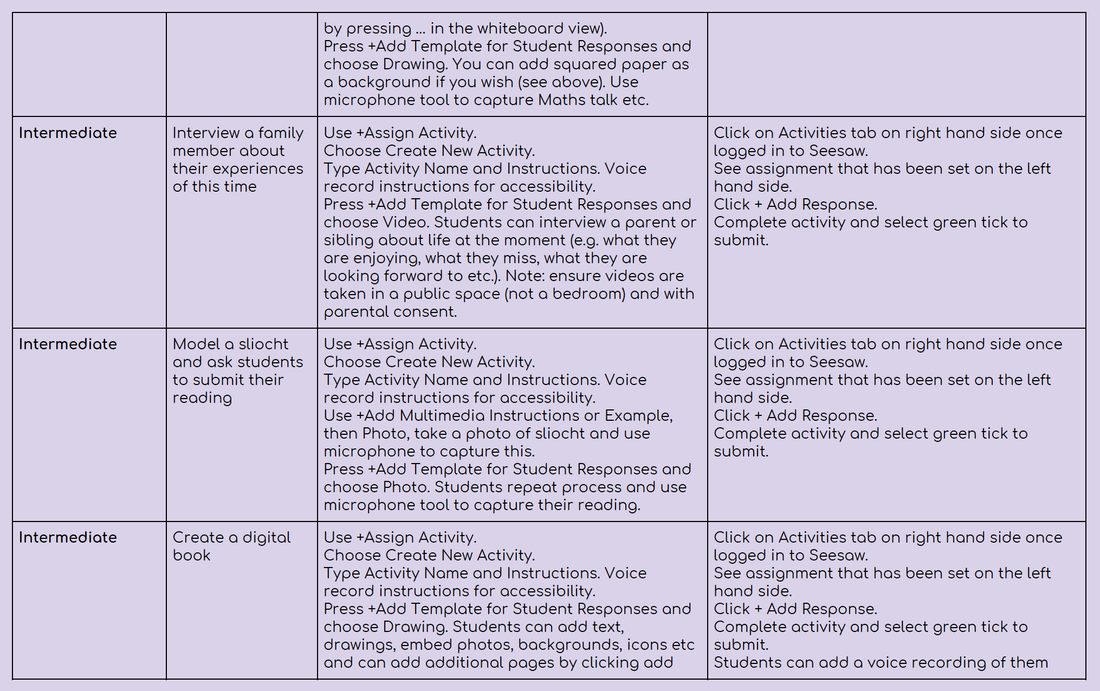
- Seesaw has an activity bank that you can use and you can also create your own activities.
- Visit https://web.seesaw.me/ and click Sign up Free!
- Click I’m A Teacher and complete form.
- Enter class name and choose class level you are teaching.
- Click your name in the top left and then the cog.
- Click Account Settings and Trial Seesaw Plus to activate the free 60 day trial.
- In the Display Name box type in the name you would like students to see when the interact with you on Seesaw.
- Press +Students on the bottom right of the screen to add student names.
- Click No to “Do you want students to sign in to Seesaw using their Google accounts or email address?”
- Click Shared Devices when asked “Most often, do your students share devices or do they have their own device?”
- You can paste a list here if you have one.
- The next screen will say “Get Students Signed In,” however these codes shown are if students are logging in at school and do not apply to home learning. Click X to close this window.
- On the main Seesaw screen, you will see a button which says “Get Home Learning Codes.” Click this button. When students sign in to the Seesaw Class app or website using their Home Learning Code, they can complete activities, view their journal and view announcements. Students will not see other students’ work. Treat these codes like passwords and store them securely.
- Click Download Codes, and they will open in an Excel sheet.
- A unique 12 letter code will be created for students and needs to be shared with families. This will allow students to log in from home using seesaw.me or the Seesaw Class app.
- It is important to adjust your class settings. To do this, click the wrench in the top right hand corner. The main things to note are:
Student Likes and Comments: best to turn off
Students Can See Each others’ Work: best to turn off for home learning
New items require approval: MUST be on so that the teachers sees all student work submitted
Enable item editing: Turn this off as this can allow students to tag one another in their work.
Enable family access: This is to allow parents to see a child’s work and is ordinarily used to provide a home- school link when students are completing work at school. It is probably not necessary to enable this. If you do, bare in mind that parents can message you via the app. This can be turned off after parents are added in the Manage Families menu.
|
|
|


